Saturday 30 November 2013

The Cost of Compromise

I'm sat here enjoying one of those lovely late autumn, early winter days where the light is just right to take the camera out for a bike ride. Or, to sit down and make a serious start on the scary art of track laying.

It is is so so tempting to get the camera and bike out, but since my darling wife has gone out shopping for today perhaps it is time to take the soldering iron by the bit (I've done that a few times in the past) and get practical.

So I have done, though it being around fifteen years since I last built any track, and thirty since I last dabbled in EM, I'd forgotten how much preparatory work I had to do. Which is why I find time now to pause and reflect whilst the sleepers are steeping in point stain solution.

In a reply to a comment from Geoff I mentioned that I was struggling with the geometry of Llanrhaiadr Mochnant. A late night yesterday has seen some real progress made on that front. I'm still not sure how to reconcile all the photos but I've worked out some of the subtle curvature involved although at the cost of increasing the baseboard width to two foot. 

The apparently simple modification of swapping the in use platform from being on the down line to being on the up line of the loop has had an awful lot of knock on effects including the need to presume some alterations to the geography and history of the line. I'll share more on that when I post the next version of the track plan.

In the meantime I've started laying some track on the hastily constructed test baseboard. I'll spare you the photos for now, but being unable to resist the urge to place some OO gauge stock and the buildings from Apa on to it to see how it looks has made it rather obvious that I've subconsciously built the first couple of feet of "The Art of Compromise" 

At this stage we need to add another compromise into the mix, which is our new car. Somehow I've been persuaded that after a few years of running around in a comparatively spacious Merc A class that  we should buy another Toyota IQ before they go out of production at the end of the year. As the non-driver in the family I feel a little railroaded into this, but there you have it. Anyone familiar with the IQ will recognise that one description that can't be applied to the luggage space is "spacious". Not that that should matter, of course, because in theory the layout doesn't need to be portable.

If I did go down the route of building TAOC it would still be an intermediate step to LM. Llansilin Road would be the obvious Tanat Valley station to adopt to suit with a  few elements of Blodwell Junction thrown into the mix.

Lets see how the track building progresses this week.


Thursday 28 November 2013

New Additions

I've finally managed to pick up a couple of 14XXs off ebay, one GWR Airfix and one BR still in a GMR box.

Both are destined to have Mainly Trains detailing kits applied to them, and one at least will end up on a Comet EM gauge chassis. The other might end up being retained in OO form at least until Apa Valley ends up in the bin an Llanrahaiadr Mochnant rises from the ashes.


In shots like this the photographic backscene actually works

Until then I've been getting a few jobs done post Warley. I've changed the line of the wooden fencing so it doesn't obscure the signal box in photos and made a start on adding foliage to the trees at each end. The stove pipe on the signal box is now a more realistic height and the area where the rodding comes out of the frame room has been tided up. I still need to leave a saucer of milk out for the cat though.

The layout in its entirety 

Sunday 24 November 2013

Warley 2013 - Or Bye, Bye, Albion Yard.

Why do we go to model railway exhibitions?

Can someone remind me which layout this is?

I wonder how many answers there are to that question, and also how many of them survive close scrutiny.

I think the most honest answer I got today was from the chap who'd come up from Devon for the day and claimed, when I met him in mid afternoon, not to have seen a single layout because he'd spent so long chatting to people.

It is purely coincidental that I met him at the bar, and that they had run out of anything that might be properly considered beer.

I'm still thinking of my own answer.

In the past I'm fairly certain I would have said it was to see for myself layouts I'd been impressed by  in magazines, and to learn from other modelers.

There is still an element of truth in both of those points, though I've lost count of the times I've been disappointed by a layout that looked stunning in carefully stage designed photos and many times in the past any learning I've done has been by observation, not by engaging in anything more than the most superficial conversation.

I have to say that I find operators more and more willing to chat as I get older. I wonder if that is because layouts have become generally more reliable giving the operators more bandwidth, or if it is a generational thing. Certainly the heritage layout on display seemed to involve so much effort to operate that interaction with the audience was non-existent. Incidentally where but at a show like this would I get a chance to spend fifteen minutes discussing my tyro point building fears with Norman Solomon?

Show are also a great place to pick up bits and pieces from specialist traders, especially those small items that would attract relatively high p&p charges. Most of my purchases were related to track building and the switch to S&W couplings. What I forgot to buy were the underfloor bits and bobs for the MK1 coach. It was good to meet the people behind Lcut Creative as well, and to discuss their design philosophy.

It is easy to forget that a perfectly acceptable reason to go is to actually enjoy just looking at the layouts. I have to say though that every year I go to Warley I get the feeling the layouts I most enjoy watching aren't the ones that appeal to the masses.

So what about the layouts this year?

Frankly I thought they were disappointing. So rather than last year's quite comprehensive review I'm going to focus on three layouts in particular, with a few honourable mentions for others.

Let me get the three negatives out of the way first.

Paul's pre-Warley blog about backscenes should  have printed out and handed to the builders of most of the layouts at the show. The lighting at the NEC is interesting at the best of times, but when combined with a lack of decent backscenes it makes photography a real chore. Hence many of the photos that follow are tightly cropped, and I've converted them all into black and white.  I'm not sure whether no backscene is better or worse than a bad backscene that looks like an afterthought. This isn't just about photography either. It is hard to immerse yourself in a layout when distracted by things in the background.

Secondly, is it now compulsory to have so many working lights scattered around a layout, all set at maximum intensity so that it looks like a Xmas tree?

Thirdly why do layouts have to be crammed full of cameos and things going on? Mike Cougill wrote a thoughtful piece on the power of empty recently.

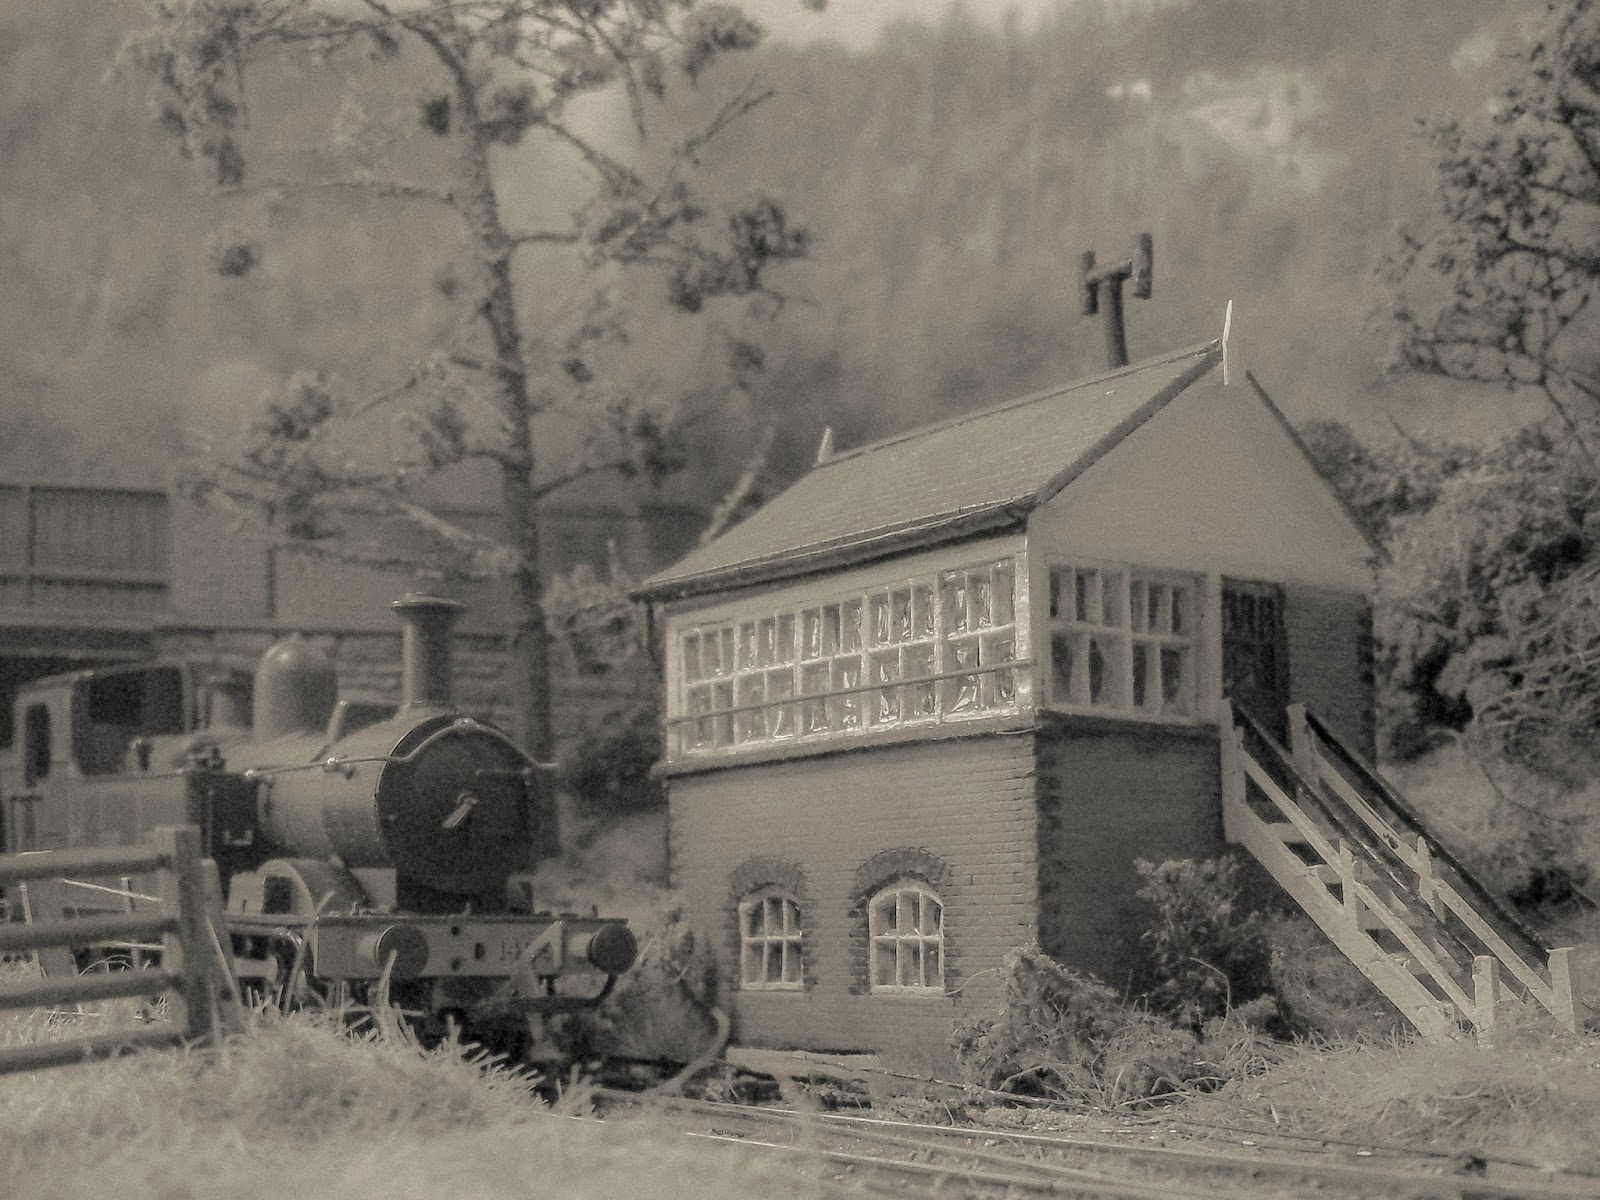
Selsey was a good example of this. I really struggled to find a shot that didn't include something that I was meant to find interesting or amusing. Every individual item was modeled to an impressive standard but the sum was less than the parts. I eventually found an area at the back of an engine shed that was relatively low key.


The OO9 Glyn Valley Tramway layout demonstrated this tendency as well. This is a line close to my heart and has been on my to do list in O16.5 ever since Stephen Poole bought out what is now the Peco GVT loco kit, and Roy Link published his GVT in 8'x10' plan in the Modeller. This layout caught some of the atmosphere quite well, but wherever you looked there wasn't just one thing going on but several. and the overall impact went from being a model of a prototype location to being just another hackneyed OO9 layout. Again I managed to get just one shot that avoided the worst excesses. Even so a traction engine and a steam lorry are in shot, though the horses don't seem bothered.


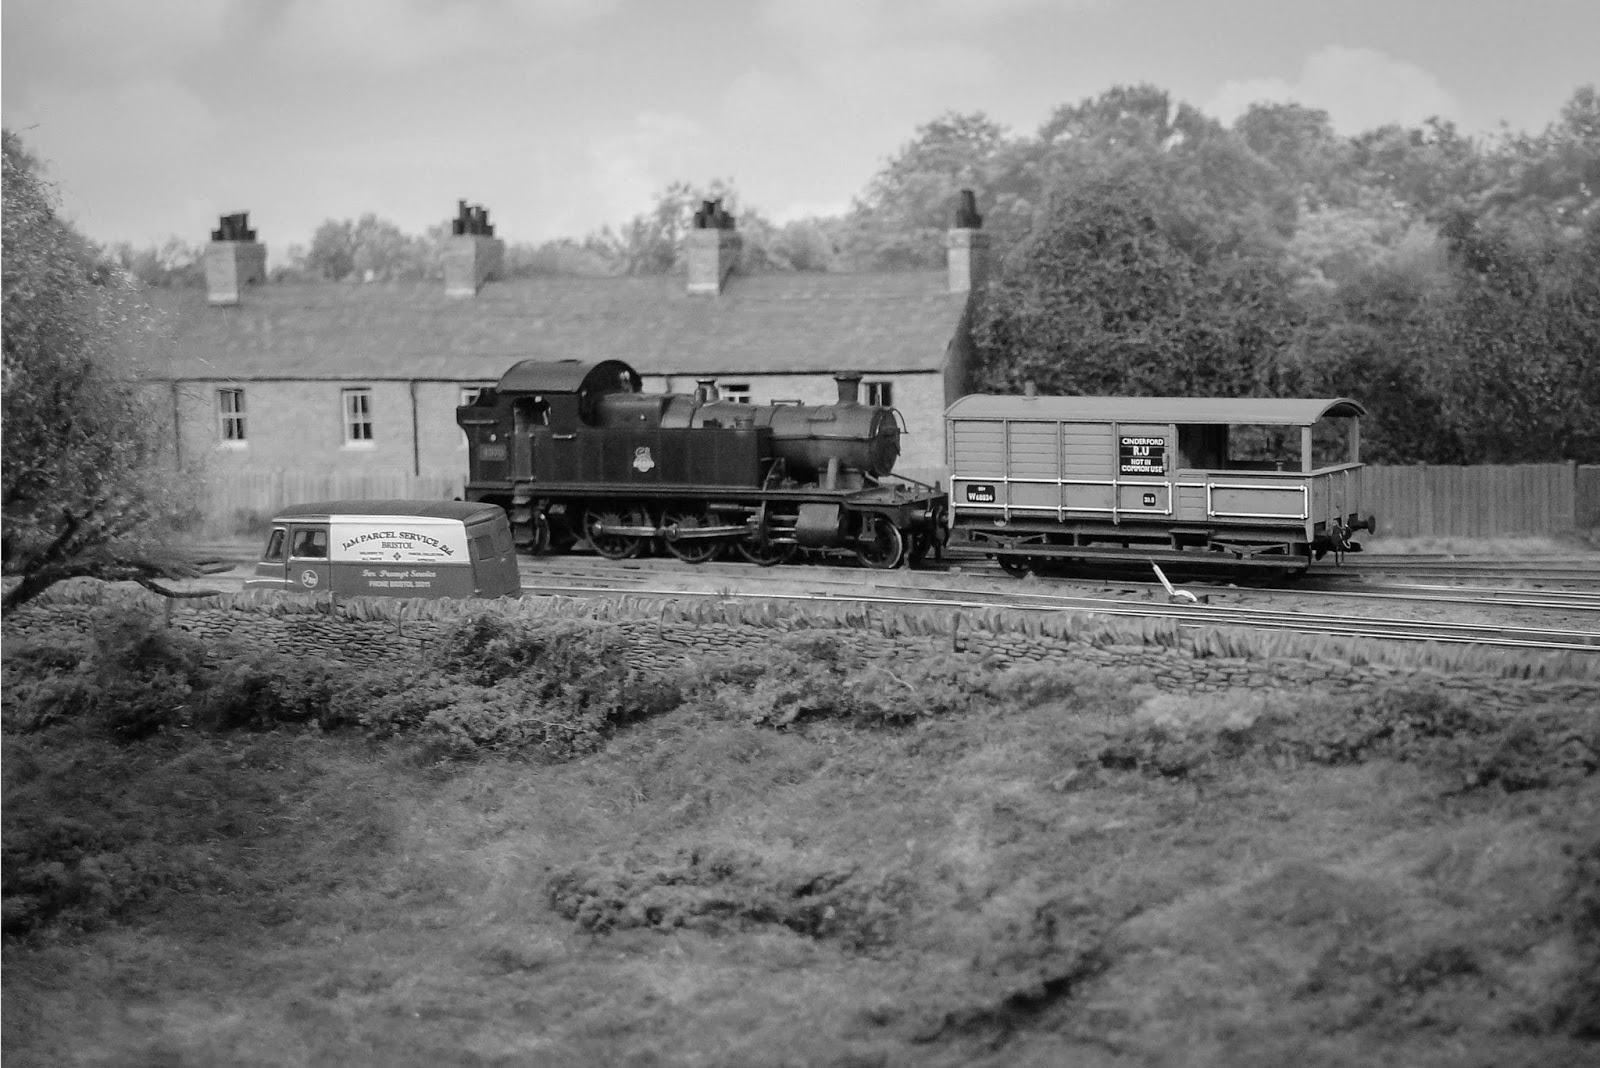
Cameos can work. Take this for example from one of the layouts whose name I've forgotten. Though even then I think it only needed one of the two pairs of figures to be effective. Don't get me started on extremely low relief factory buildings as backdrops.


Rolvendon at least used the cameos to evoke a time and place, as with the hop growing scene.


At times wandering around the layouts I thought it was like so much that has been achieved in the last thirty years has been forgotten. At the same time it was sad to hear so many people dismissing Borchester Market on the grounds that "anyone could do that now". I don't think in its current condition the layout quite captures the full Dyer legacy, but the one thing it clearly does is represent a working railway.


A good example of what the typical modeler of today could expect to produce was the simple Aldbury Town, although if you are going to use P4 I would query the use of so many kit built buildings


In the past those of us in the UK used to envy continental modelers the quality of the out of the box products they had available, but deride their toy train approach to layouts. Year after year I think Warley shows how outdated that view is and as usual many of the layouts I spent longest  looking at were not of or from the UK.


I was particularly impressed with  aspects of Thanasee-Cabusart although it was hampered by the narrowness of the baseboards.


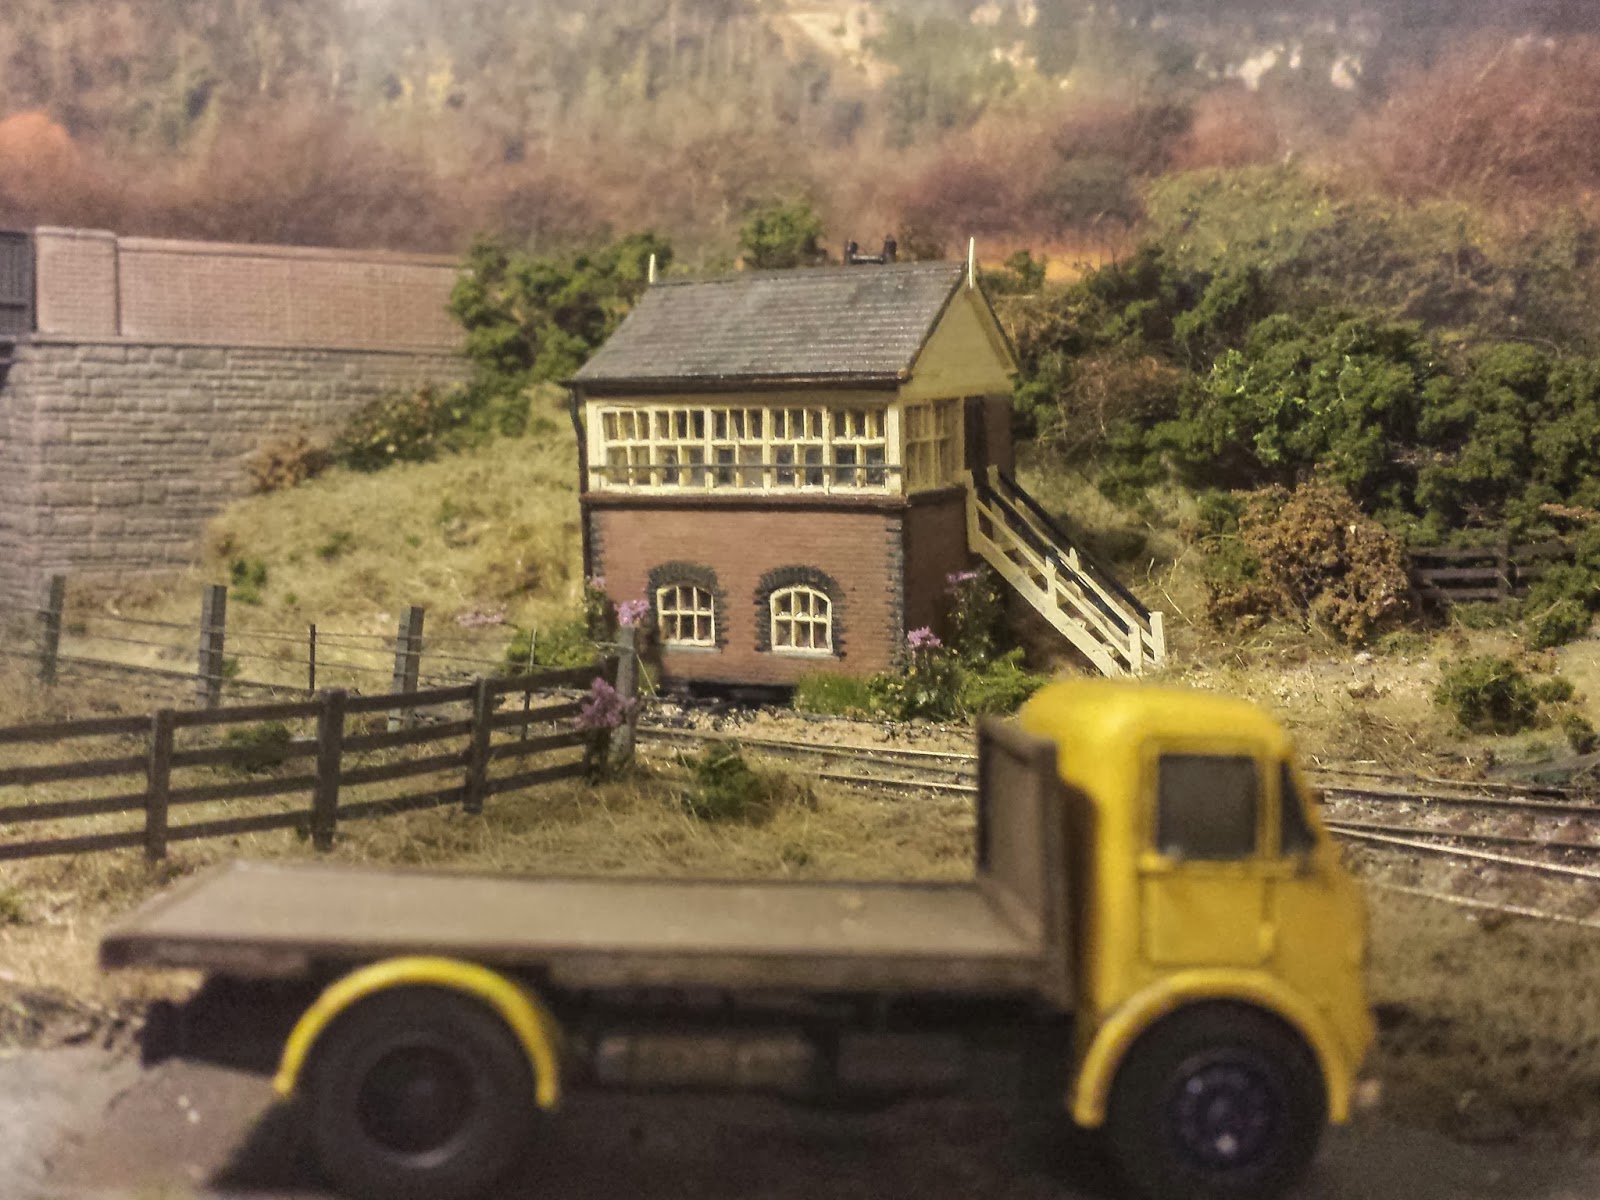
Now for the three layouts that I went back to time after time. Conveniently two of them were co-located, and not only that they were models of the same prototype. I'm referring, of course, to Peter Kazer's Corris, and Rod Allcock's OO9 Corris 1930. I still remember how blown away I was when I first saw Peter's model and in many ways I think it is still one of the finest narrow gauge layouts ever built. But gosh, how it needs a backscene when at an exhibition like this. Rod's version, and his locos, show how OO9 has matured and is a brilliant interpretation of the real life Corris to make a visually appealing layout. It is a pity they were forming two sides of an L so it wasn't possible to see them both together at the same time. Had I been more structured I would have tried to take  similar views of both layouts for a comparison. Peter's version dominates the photos simply because it was easier to get up close to.


So that leaves one layout to discuss, which was my favourite of the show, and the title of this post has already given that away. Since this was supposedly its last appearance I've left it quite late to see Albion Yard  for the first time. I'm glad to see it lived up to my expectations . When a layout is already so well photographed you might question the point of trying to take photos of it in the less than ideal conditions of an exhibition hall. But I couldn't resist!


And finally perhaps my favourite shot of the day:


Thursday 21 November 2013

Ready for Warley

Obviously I'm not exhibiting!

Hopefully though I'll get to Warley again this weekend. I have been known to forget the show is on before now.

I promised myself that I would get the signal box more or less finished before then, so here it is.

As usual things that looked OK at one stage have managed to warp, shift, unglue and generally mess themselves around behind my back.


The guttering got twisted when I fixed the roof down, I'm glad to say that overnight it has sprung back into shape. I do like the Ratio product.


I really must straighten the fencing, which still isn't glued down and blend in the bridge. Under natural light the stonework has some nice subtle colouring  but it disappears under any artificial light. It needs be a bit browner anyway. The Glue 'n' Glaze in the windows of the AEC seems to have gone a bit matt as well.  The finials need another coat of paint. The stove chimney is taller than it appears here, but rechecking photos should still be a lot taller.  


Retrofitting the Wills point rodding wasn't easy but I know how to do it better the next time. I must straighten that FPL cover. The combination of the square Wills rodding and the round MSE doesn't look right and I might still replace the MSE with Wills for consistency.  The one Wills component that I found jarringly overscale visually are the curved cranks. It is pity some signal pulleys aren't included. I've struggled with the etched versions on the market and would love to know of some alternatives.

Still I'm generally happier with it than I was earlier this week. Guttering, finials, and the safety bar in front of the windows have all improved it, I think.

All the above are mobile phone pictures so they do distort quite a few things. In the flesh the arrangement of the weighbridge and the box works better, with the weighbridge providing a clear foreground and the box snapping into the background.

This shot has a more natural perspective. I'noticed when I took this that I'd forgotten to put the tree back in. I took it out allow so I could work on the signal box area. Having now put it back in again I've realized it is another of those individual elements that have a big impact on the composition of such a small scene.


I don't need to mention that none of the interior is visible, do I?

Happiness

Look what dropped through the letter box this morning.


Sunday 17 November 2013

Interior Dialogue

It appears that a little known international legal convention requires that all signal boxes modeled in scales of 4mm and above should have a detailed interior.

An even less well known sub clause allows exemptions from using the kits intended for the Wills and Ratio signal boxes under exceptional circumstances.


This applies even when said signal box is:

- at the back of the layout
- has no interior lighting
- has window panes smaller than any other building on the layout.


I thank m'learned friend Iain Robinson for bringing this to my attention.

Thursday 14 November 2013

A Question of Logic

I've had my thinking hat on again, in another attempt to synthesize Lanrhaiadr Mochnant and The Art of Compromise to produce a version that won't take up too much space in the office.

Point rodding in blue

Compared to earlier versions I'm planning to swap the viewing side over, so the goods shed will be at the front, as it is on Apa. Compared to the real LM the big changes are the replacement of the level crossing with a bridge and moving the main platform  to the down side of the loop. A quick reminder that in any case the model is going to be set both after passenger working ceased in 1951 and after LM became a terminus in 1952. Changing the level crossing for a bridge means I have to decide where to put the motley collection of sheds and the weighbridge. I suspect I won't reach a final decision on that until I place some mock ups on the baseboard. I don't think there is actually an obvious on scene location for the weighbridge that makes sense . A couple of other bits of the jigsaw have now fallen into place, including where the iron mink stood that was used for additional storage in the yard.

The jigsaw I'm not so sure about involves the points and signalling, because some of the edges of the puzzle are missing. Literally so when it comes to photos.

You might need a pen and paper for the next bit....

What I do know is that the LM lever frame had twelve levers, and Mike Lloyd records ten of them being in use at some point in time. I'm fairly certain that four levers were for signals. I know that three sets of point rodding ran along the downside of the line and I'm presuming two of those operated the points at 7 and 8. I'm guessing that point 8 at least had a facing point lock, which could account for the third rod, though the onlyTVR  FPL I have a photo of, at Llansilin Road, appears to have been operated off the same lever as the point.

Is it possible that point 7 didn't have a FPL because passenger trains wouldn't have used it in the up direction, or would it have had an economical FPL? In that case though wouldn't the FPL' for points 7 and 4 have been of the same kind, so why would they need rods from the lever frame?

Two rods pass under the loop, one of which then runs along the down platform towards the cattle dock siding. I think this continues to the catch point on the cattle dock siding. The second one, I presume, controls the catch point on the goods shed siding.

Three sets of rodding run alongside the up platform. One crosses under the loop at the end of the platform and controls point 5, so I'm guessing the remaining two control point 4 and its FPL.

That by my calculations comes to eight sets of point rodding, and four signal cables.

So the next question is what levers would have controlled what, and how would the interlocking have worked. Using TRAX 3 this is my best guess so far


It seems to work for most of the obvious movements and conflicts I can think of. When/if I get around to building it I'll be using DCC so at least I'll be able to amend things. Any advice and observations at this stage though would obviously be more than welcome.

Tuesday 12 November 2013

Outside In

Not for the first time I've been doing a lot of thinking about layout design.

If I was to wind the clock back a couple of years and ask myself what is different about my approach these days I don't have any doubt that the answer is that I'm now "driven by the prototype."

Now bear in mind that two years ago I thought I was as well, so what has really changed is my interpretation of what that means.

Some of it is that details I once thought were unimportant now matter to me. I never thought that I would spend my time at a model railway show looking at point rodding, but I do.

Moe importantly though is how this makes me think about how to put a model railway together. My mantra is becoming  "Prototype down, trackbed up"

I suppose I need to articulate this a little more, though to be honest I'm struggling to do so.

I think we often fall into the trap, I certainly did with Apa, of beginning with the track plan, not the overall track bed within the railway boundaries. Yet so much of the atmosphere of  railway is set within that extended area. To get that right it has to be thought about at the very beginning because it is very hard to retrofit features within that space, or perhaps more importantly, to increase that space if you haven't allowed for those features. Anyone who has tried laying point rodding alongside a platform when you've already ballasted the track will know what I mean. Getting the track bed right provides the backbone on which the rest of the layout is built.

I was looking at a layout the other day and thinking that had the builder thought through the infrastructure needed to operate the full size version it would have fundamentally where he'd positioned lineside features and acted as a natural brake on his tendency to cram in too much into too small a space. That is another tendency we all have I suspect, to want to cram in that little bit extra, and it starts at the design stage.

That's the trackbed up part of the equation. The prototype down part is perhaps harder to explain. For me I think it has strong links with photography, because I know what I want to to create in a model is a scene that can be photographed to resemble the real world. That doesn't happen by lucky chance...except perhaps it did int he case of Apa. What I think we do too often is build up layers of scenery in the hope that the final effect will be realistic, rather than deconstructing a scene and thinking about how to recreate it.

Saturday 9 November 2013

Signal Box Progress

I really don't have either the eye sight or the steady hands needed for painting individual bricks. This has been confirmed by progress with painting the signal box.


Any requests for photos from any closer than this are going to be politely but firmly refused. I'm actually quite happy with the roof and the red brickwork has been rescued from a near disaster. I'm also impressed how painting the one handrail of the staircase dark grey has helped disguise its chunkiness.


It is the engineer's bricks that have caused me grief. First of all for some stupid reason I prevaricated about buying a new brush to paint them, and secondly having had to fill the corner joints I'd managed to obscure many of the laser engraved mortar lines. I've already alluded to my poor eye sight and unsteady hands, a mix to which was added to by the distractions of the need to get two important PowerPoint presentations out the door before Sunday and a poodle throwing herself loudly and repeatedly against the kitchen door.

All in all then it isn't surprising I've made a pig's ear of it. Hopefully tomorrow I can tidy it up a little. On the plus side I think I've got the colour right, for which I can thank Kevin Robertson's "Western Region Signalling in Colour"

I'm sat here now wondering if I should follow Iain's example and cut the quoins out of brick paper and overlay them. I took one of the photos of the kit parts using a scanner, so in theory I could use that to produce an exact 1:1 fit

Thursday 7 November 2013

The 100th Post

Having spent a considerable number of the last 99 blog posts procrastinating about building a signal box it seems fitting to use the 100th to unveil that Apa now has a signal box.


OK, there is a lot of work still to be done on it, especially the brickwork on the corners, and the roof section is still separate whilst I make my mind up about whether to fit an interior. The base it is sitting on is temporary as well.


The attempts to add relief to the flat out of the box walls have had mixed success. On reflection I think I've been too subtle about it. but I think I need to wait and see what it looks like when painted.

This isn't going well!


Overall I think it has improved the overall composition of the scene. Its final position will be over to the right rather more so as to better relate spatially to the weighbridge hut from my normal viewing position in the office chair. Looking at the picture below it bigger than it does in the flesh for some reason. Possibly that is because of the overexposed roof.


The theory of the original plan was that the signal box would draw the eye away from the ends of the box and distract you from noticing that only half the station is modeled. My first impressions is that it has worked and it is also pulling the eye back from the join between the back scene and the hedge.

Saturday 2 November 2013

Cheating

With a weekend that is currently scheduled to involve working until 9pm on Sunday night I'm wondering, as ever, about how to make life easy for myself and what shortcuts I can take.

By now I should know of course that every shortcut turns out to be a diversion with a Road Closed sign at the end of it. But something has to be done about the signal box.

So yesterday morning this popped through the letterbox:

It is a laser cut kit for a GWR signal box from Lcut Creative costing the massive sum of £6. At that price I think I can afford to try it out as an experiment.  I was thinking about using it in conjunction with their other style of GWR signal box window, or with my previous attempt to utilise the Ratio frames, to help speed up building a model based on Blodwell. First of all though I'm going to build one straight out of the box. Although not correct for the TVR it has roughly the right footprint and will at least let me judge if it improves the composition before continuing to invest time in the scratchbuilt/kit bashed  box.


To be honest I want to see what results I can get with laser cut wood model since I still think it is a possible way forward for the buildings on Llanrhaiadr Mochnant. I'm a little concerned that I have yet to see a painted version of one the Lcut Creative models, and I'm not sure whether the interlocking brick approach to corner joins will work or not. Actually if I could get the toy poodles to stop jumping around I might have built it by now, but I've found by bitter experience that starting work on anything whilst they are in the room is a big mistake, especially if glue, paint or scalpels are involved.

Incidentally one nice touch is that the kit includes parts for both right and left handed doors, which also gives me a couple of spare pieces to experiment on.

An attempt at adding some relief to the flat kit wall

Lcut Creative have some You Tube content on the techniques for building these kits, and a comprehensive manual available to download.

Whilst on the subject of cheating, though I know it isn't really, I've also succumbed to order a very small selection of Silfor products. I think Apa is now at the stage where I can justify the relative expense  and I can use them to best effect.

I've also been thinking about a few other things that might make life simple going forward. Most of these are below the baseboard. Something that crossed my mind the other day though is whether anyone has considered a discrete coupling, in the spirit of the Sprat & Winkle, to fit a NEM coupling socket? I know there is the Kadee option.