 |
| CIE 071 class EMD JT22CW series diesel-electric 073 waits patiently at Westport Station whilst pit props are loaded. Behind it is the remaining spur of the line to Westport Quay |
Thursday, 23 August 2018
A Prelude to an Irish Interlude

Wednesday, 25 July 2018
A Motor Racing Diversion
What better way of spending a Sunday than basking in the sun at a circuit that evokes the glory years of British motor racing, like Cadwell Park?
We had a great day watching the VSCC meet last Sunday.

Here you see a typical member of what someone we know thinks is the aloof Frazer Nash "Chain Gang" attacking the mountain in Thunderbug, powered by a Riley crankcase and 4.2 litres of aviation technology.
Both before and after the event drivers and owners loved talking about their cars. Thunderbug's owner took pains to explain to a boy how he drove it "responsibly" on the roads by reference to the red line on the rev counter. I dread to think what speeds that equates to.
Two highlights for me were this Targa Floria Alfa


We had a great day watching the VSCC meet last Sunday.

Here you see a typical member of what someone we know thinks is the aloof Frazer Nash "Chain Gang" attacking the mountain in Thunderbug, powered by a Riley crankcase and 4.2 litres of aviation technology.
Both before and after the event drivers and owners loved talking about their cars. Thunderbug's owner took pains to explain to a boy how he drove it "responsibly" on the roads by reference to the red line on the rev counter. I dread to think what speeds that equates to.
Two highlights for me were this Targa Floria Alfa

And the ex-Prince Bira* MG Magneta owned by John Gillett who was also immensely approachable and fun to talk to, as you might expect from an Aussie.

More photos, OK a lot more photos, over on Flickr
*Thus providing an obscure link to the world of models
Tuesday, 17 July 2018
Delays
Rails Round The Rectory is theoretically a week away from completion, but life keeps intervening.
I finally bit the bullet and bought a new computer. My old one had a decent enough basic specification on paper, but the build quality was pretty bad which in turn impacted on the ability to upgrade it, and how it performed over time due to cooling and power supply limitations.
The replacement from Chillblast is many times quieter and runs a lot cooler. In fact, it looks way cooler as well, especially on the inside.
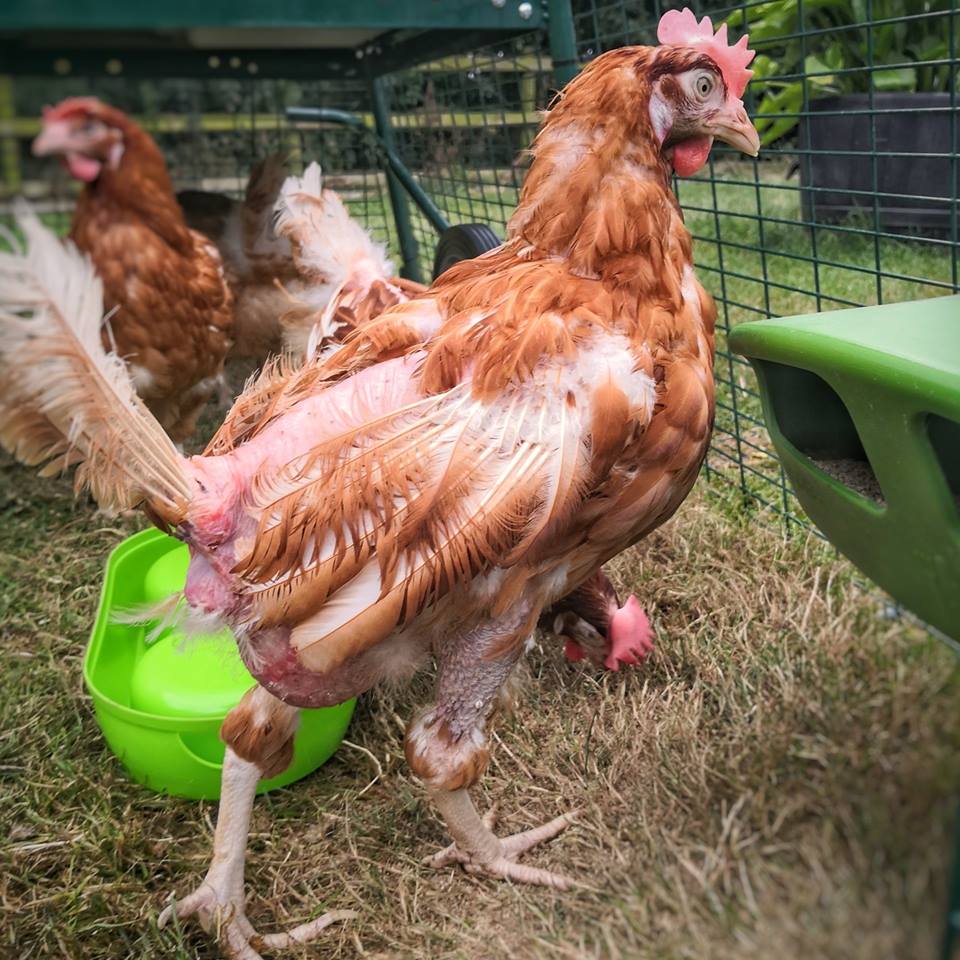
The other cause of delay is that my beloved finally convinced me we needed to rescue some ex-battery hens. The thing with chickens is that I find myself spending hours just watching them and enjoying their company. This is especially true when you see rescue hens beginning to explore a big wide world for the first time.

I finally bit the bullet and bought a new computer. My old one had a decent enough basic specification on paper, but the build quality was pretty bad which in turn impacted on the ability to upgrade it, and how it performed over time due to cooling and power supply limitations.
The replacement from Chillblast is many times quieter and runs a lot cooler. In fact, it looks way cooler as well, especially on the inside.
The other cause of delay is that my beloved finally convinced me we needed to rescue some ex-battery hens. The thing with chickens is that I find myself spending hours just watching them and enjoying their company. This is especially true when you see rescue hens beginning to explore a big wide world for the first time.
Wednesday, 27 June 2018
Coming Soon
Being back in the UK with no prospect of travel has been so liberating, especially with the Summer evenings. I've never been a Winter modeller.
So Rails Round The Rectory Mk1, RRTR1 from now on, has made comparatively rapid progress.
Track is laid, and since the layout is so short and straightforward I've succesfully installed a simple shuttle module, as there is no point in using manual operation. I'm kicking myself that I spent ages over complicating the wiring before working out a sensible combination of two pin connections to allow for both automated and manual operation.
I first used Liquitex to build up the bark texture on wire armature trees, but on RRTR1 I've used it to build the basic ground texture. What I should have done is to mix some cheap acrylic colours in with it first. I've also learned that the best approach is to build up thickness with multiple layers and only to add texture to a final top layer. I'm hoping it will prove more flexible than anything I've used in the past. and less messy! Results so far look promising.
Having mentioned wire armature trees I've actually decided to use the old standbys of seafoam and, primarily, Woodland Scenics plastic armatures for now. To be honest this is less from convenience than from wanting to try out a couple of new ideas for "background" trees for RRTR2 that combine old and new approaches.
Background and back-scenes is another interesting topic with the diorama being built on such a small base. I'm simultaneously trying to open up views whilst also setting up cameo viewpoints. The consensus from exposure on Facebook is to go for magnetically attached back-scenes for photography but to leave them off for display purposes. That will also let me experiment with a couple of ideas, and settle on the final orientation for RRTR2.
The remaining big decision is about the Rectory. Whilst I have happy memories of it, it is hard to be enthusiastic about the real thing's aesthetic merits, so if I do add it to this scene it will be a small Victorian version. But I'm also not sure if even then it wouldn't unbalance the layout. I think I'm going to have to build something and then decide.
I'm going through a similar thought process with road vehicles. Again my basic conclusion is that most of them belong on RRTR2, not this version. If I could find one I would model Teddy's Austin Maxi ,but instead, I think I'll include one of our family cars, probably the Mk2 Jag. At least I have a store of suitable vehicles for the next version.
Which brings me on to rolling stock. Part of the appeal of Cadeby as a model is the ratio of locos to wagons, and I think I'm close to emulating it rather too well, and with too many substitutions. In fact, true confession, I have enough locos to occupy the entire track layout of RRTR1. My excuse is that since I intend RRTR 1 and RRTR2 to co-exist I'll split the locos between them.
So that pretty much brings us up to date. Videos and photos will hopefully follow after another weekend of progress.
So Rails Round The Rectory Mk1, RRTR1 from now on, has made comparatively rapid progress.
Track is laid, and since the layout is so short and straightforward I've succesfully installed a simple shuttle module, as there is no point in using manual operation. I'm kicking myself that I spent ages over complicating the wiring before working out a sensible combination of two pin connections to allow for both automated and manual operation.
I first used Liquitex to build up the bark texture on wire armature trees, but on RRTR1 I've used it to build the basic ground texture. What I should have done is to mix some cheap acrylic colours in with it first. I've also learned that the best approach is to build up thickness with multiple layers and only to add texture to a final top layer. I'm hoping it will prove more flexible than anything I've used in the past. and less messy! Results so far look promising.
Having mentioned wire armature trees I've actually decided to use the old standbys of seafoam and, primarily, Woodland Scenics plastic armatures for now. To be honest this is less from convenience than from wanting to try out a couple of new ideas for "background" trees for RRTR2 that combine old and new approaches.
Background and back-scenes is another interesting topic with the diorama being built on such a small base. I'm simultaneously trying to open up views whilst also setting up cameo viewpoints. The consensus from exposure on Facebook is to go for magnetically attached back-scenes for photography but to leave them off for display purposes. That will also let me experiment with a couple of ideas, and settle on the final orientation for RRTR2.
The remaining big decision is about the Rectory. Whilst I have happy memories of it, it is hard to be enthusiastic about the real thing's aesthetic merits, so if I do add it to this scene it will be a small Victorian version. But I'm also not sure if even then it wouldn't unbalance the layout. I think I'm going to have to build something and then decide.
I'm going through a similar thought process with road vehicles. Again my basic conclusion is that most of them belong on RRTR2, not this version. If I could find one I would model Teddy's Austin Maxi ,but instead, I think I'll include one of our family cars, probably the Mk2 Jag. At least I have a store of suitable vehicles for the next version.
Which brings me on to rolling stock. Part of the appeal of Cadeby as a model is the ratio of locos to wagons, and I think I'm close to emulating it rather too well, and with too many substitutions. In fact, true confession, I have enough locos to occupy the entire track layout of RRTR1. My excuse is that since I intend RRTR 1 and RRTR2 to co-exist I'll split the locos between them.
So that pretty much brings us up to date. Videos and photos will hopefully follow after another weekend of progress.
Friday, 8 June 2018
Crossover
I try and keep my professional and hobby blogs separate, but sometimes something happens that is so important that it needs to be said on multiple platforms.
We tend to be a very male, and if not autistic then at least unemotional group of people.
I would have said I'm a hundred times more emotional than my cousin Danny, but he is the one who killed himself.
http://coreitsm.blogspot.com/2018/06/lessons.html
We tend to be a very male, and if not autistic then at least unemotional group of people.
I would have said I'm a hundred times more emotional than my cousin Danny, but he is the one who killed himself.
http://coreitsm.blogspot.com/2018/06/lessons.html
Tuesday, 22 May 2018
More Progress
I dread to think how long it is since I last modelled in OO9. Suffice to say it wasn't in the current century, and my eyesight was a little better.
Thankfully, or perhaps not, a camera and decent sunlight makes it a lot easier to see what you have done, if not what you are doing, as these WIP photos show.


So still quite a bit to do still. As well as quite a bit of retouching I definitely want to replace the front glazing.
There are two things in my defence. The first is that these are horrendously close up shots of a very small model, and the second that the body is a very basic WSF Shapeways print.
That was quite a deliberate choice because I wanted to see if I could use the coarse surface to aid a look of dereliction on what was never meant to be a working loco but parked at the end of a siding mouldering away. It isn't meant as any criticism of the base model.
At that time I hadn't realised just how rough even a more expensive print can sometimes be. In fact, it can vary considerably even when you order two prints at the same time.
I was actually surprised that the flat surface cleaned up quite nicely though with a lot of effort. Where it has caused difficulties is the window frames where the graininess is still very apparent.
Thankfully, or perhaps not, a camera and decent sunlight makes it a lot easier to see what you have done, if not what you are doing, as these WIP photos show.


So still quite a bit to do still. As well as quite a bit of retouching I definitely want to replace the front glazing.
There are two things in my defence. The first is that these are horrendously close up shots of a very small model, and the second that the body is a very basic WSF Shapeways print.
That was quite a deliberate choice because I wanted to see if I could use the coarse surface to aid a look of dereliction on what was never meant to be a working loco but parked at the end of a siding mouldering away. It isn't meant as any criticism of the base model.
At that time I hadn't realised just how rough even a more expensive print can sometimes be. In fact, it can vary considerably even when you order two prints at the same time.
I was actually surprised that the flat surface cleaned up quite nicely though with a lot of effort. Where it has caused difficulties is the window frames where the graininess is still very apparent.
Wednesday, 16 May 2018
Progess
Well, it is very much one step at a time but ten days in the UK has allowed me to make some progress on what I think of as the basic locos for Rails Round the Rectory. These are the locos intended either to be found mouldering on the siding or to be the operational workhorses leaving the Narrow Planet kits to be used on high days and holidays.


Building these from basic 3D prints has been entertaining and a learning process. The next stage for all of them involves bending small pieces of wire.
Subscribe to:
Posts (Atom)