Obviously I'm not exhibiting!
Hopefully though I'll get to Warley again this weekend. I have been known to forget the show is on before now.
I promised myself that I would get the signal box more or less finished before then, so here it is.
As usual things that looked OK at one stage have managed to warp, shift, unglue and generally mess themselves around behind my back.
The guttering got twisted when I fixed the roof down, I'm glad to say that overnight it has sprung back into shape. I do like the Ratio product.
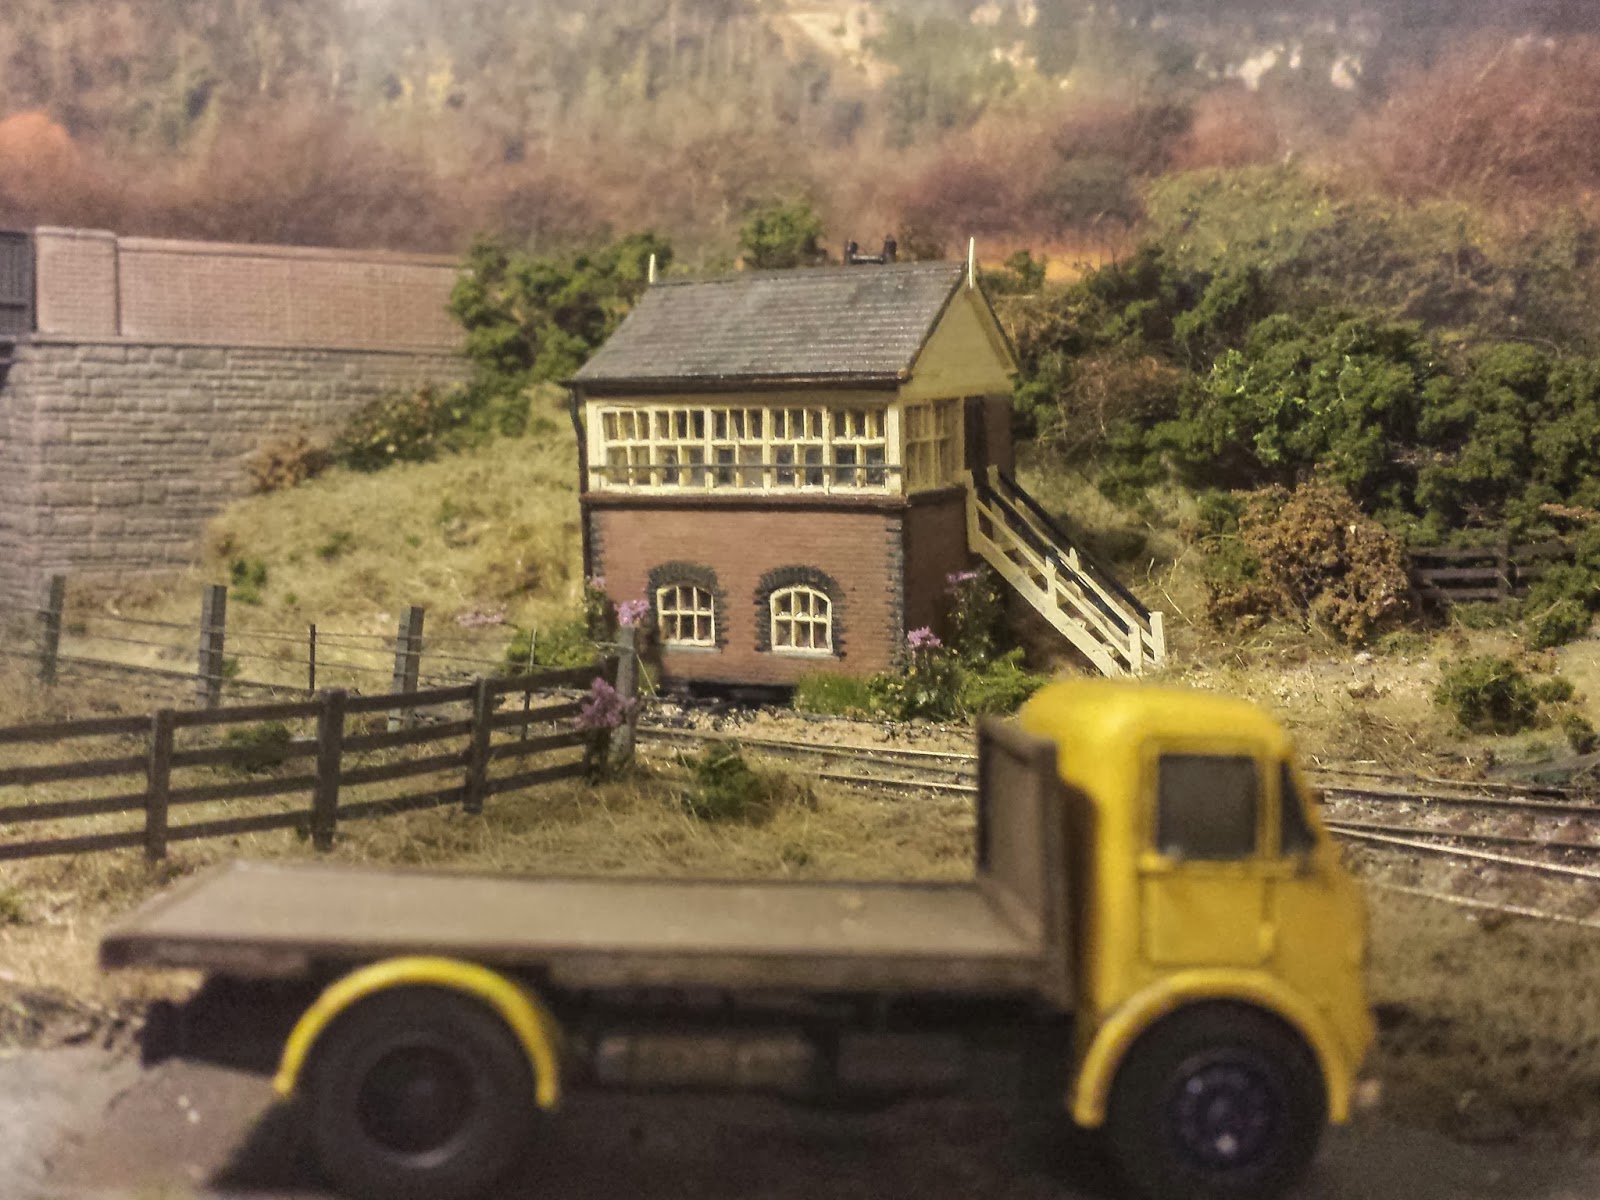
I really must straighten the fencing, which still isn't glued down and blend in the bridge. Under natural light the stonework has some nice subtle colouring but it disappears under any artificial light. It needs be a bit browner anyway. The Glue 'n' Glaze in the windows of the AEC seems to have gone a bit matt as well. The finials need another coat of paint. The stove chimney is taller than it appears here, but rechecking photos should still be a lot taller.
Retrofitting the Wills point rodding wasn't easy but I know how to do it better the next time. I must straighten that FPL cover. The combination of the square Wills rodding and the round MSE doesn't look right and I might still replace the MSE with Wills for consistency. The one Wills component that I found jarringly overscale visually are the curved cranks. It is pity some signal pulleys aren't included. I've struggled with the etched versions on the market and would love to know of some alternatives.
Still I'm generally happier with it than I was earlier this week. Guttering, finials, and the safety bar in front of the windows have all improved it, I think.
All the above are mobile phone pictures so they do distort quite a few things. In the flesh the arrangement of the weighbridge and the box works better, with the weighbridge providing a clear foreground and the box snapping into the background.
This shot has a more natural perspective. I'noticed when I took this that I'd forgotten to put the tree back in. I took it out allow so I could work on the signal box area. Having now put it back in again I've realized it is another of those individual elements that have a big impact on the composition of such a small scene.
I don't need to mention that none of the interior is visible, do I?
Moving from an OO gauge micro-layout to an EM gauge compromise, via a rather major diversion into both 7 1/4" gauge and minimal space OO9
Labels
Layout Design
Blodwell
Buildings
The Art of Compromise
Photography
Llanrhaiadr Mochnant
Scenery
Signal Box
Baseboards
Goods Yard
Track
45XX
Apa Box
EM
Lcut Creative
Travel
Backscene
Concepts
Railway Exhibitions
TVR
USA
Upwold
14XX
Anyrail
Bridge
Cuba
Cycling
Fencing
Lorry
Narrow Gauge
Point rodding
Points
Templot
Turnouts
West Maryland
Books
C+L
Fiddleyard
GWR
Hales
OO9
Phil Parker
Rolling Stock
Signals
State of the hobby
Tillig
Warley
Weighbridge
trams
2012
AC Railbus
Albion Yard
Allt-y-Graban Rd
Apa Valley
Balloch Pier
Bas
Bath Green Park
Brickwork
Bridgnorth
Bryn-y-Felin
CSX
Charmouth
Clarendon
Class 25
Cliff Railway
Coldrennick Road
Corris
Crich
DCC
Disused Railways
Dukedog
EMGS
Edwin Smith
Electrics
Emett
France
Gloucestershire & Warwickshire
HO
Hobbies
Hope under Dinmore
Hospital Gates
Iain Rice
Iliffe Stokes
Inspiration
Ireland
Kings Lynn
La Baraque
Lasercut
Leamington & Warwick
Locos
MSTS
Mainly Trains
Military Modeling
Mishaps
N guage
NEC
OOn3
Percy
Pier Railway
Porth y Waen
Preserved Railways
RTR
SMP
Seend
Sentinel
Sketchup
St Minions
Stockholm
TGV
TRAX
Tansey Bank
Techniques
Technology
Tim Horn
Trade
Trees
Ultrascale
Veldhoveh 1935
Watertank
Williamsport
diorama
manning wardle
painting
procrastination
pug
ships
simulators
Showing posts with label Signal Box. Show all posts
Thursday, 21 November 2013
Sunday, 17 November 2013
Interior Dialogue
It appears that a little known international legal convention requires that all signal boxes modeled in scales of 4mm and above should have a detailed interior.
An even less well known sub clause allows exemptions from using the kits intended for the Wills and Ratio signal boxes under exceptional circumstances.
This applies even when said signal box is:
- at the back of the layout
- has no interior lighting
- has window panes smaller than any other building on the layout.
I thank m'learned friend Iain Robinson for bringing this to my attention.
An even less well known sub clause allows exemptions from using the kits intended for the Wills and Ratio signal boxes under exceptional circumstances.
This applies even when said signal box is:
- at the back of the layout
- has no interior lighting
- has window panes smaller than any other building on the layout.
I thank m'learned friend Iain Robinson for bringing this to my attention.
Saturday, 9 November 2013
Signal Box Progress
I really don't have either the eye sight or the steady hands needed for painting individual bricks. This has been confirmed by progress with painting the signal box.
Any requests for photos from any closer than this are going to be politely but firmly refused. I'm actually quite happy with the roof and the red brickwork has been rescued from a near disaster. I'm also impressed how painting the one handrail of the staircase dark grey has helped disguise its chunkiness.
It is the engineer's bricks that have caused me grief. First of all for some stupid reason I prevaricated about buying a new brush to paint them, and secondly having had to fill the corner joints I'd managed to obscure many of the laser engraved mortar lines. I've already alluded to my poor eye sight and unsteady hands, a mix to which was added to by the distractions of the need to get two important PowerPoint presentations out the door before Sunday and a poodle throwing herself loudly and repeatedly against the kitchen door.
All in all then it isn't surprising I've made a pig's ear of it. Hopefully tomorrow I can tidy it up a little. On the plus side I think I've got the colour right, for which I can thank Kevin Robertson's "Western Region Signalling in Colour"
I'm sat here now wondering if I should follow Iain's example and cut the quoins out of brick paper and overlay them. I took one of the photos of the kit parts using a scanner, so in theory I could use that to produce an exact 1:1 fit
Any requests for photos from any closer than this are going to be politely but firmly refused. I'm actually quite happy with the roof and the red brickwork has been rescued from a near disaster. I'm also impressed how painting the one handrail of the staircase dark grey has helped disguise its chunkiness.
It is the engineer's bricks that have caused me grief. First of all for some stupid reason I prevaricated about buying a new brush to paint them, and secondly having had to fill the corner joints I'd managed to obscure many of the laser engraved mortar lines. I've already alluded to my poor eye sight and unsteady hands, a mix to which was added to by the distractions of the need to get two important PowerPoint presentations out the door before Sunday and a poodle throwing herself loudly and repeatedly against the kitchen door.
All in all then it isn't surprising I've made a pig's ear of it. Hopefully tomorrow I can tidy it up a little. On the plus side I think I've got the colour right, for which I can thank Kevin Robertson's "Western Region Signalling in Colour"
I'm sat here now wondering if I should follow Iain's example and cut the quoins out of brick paper and overlay them. I took one of the photos of the kit parts using a scanner, so in theory I could use that to produce an exact 1:1 fit
Thursday, 7 November 2013
The 100th Post
Having spent a considerable number of the last 99 blog posts procrastinating about building a signal box it seems fitting to use the 100th to unveil that Apa now has a signal box.
OK, there is a lot of work still to be done on it, especially the brickwork on the corners, and the roof section is still separate whilst I make my mind up about whether to fit an interior. The base it is sitting on is temporary as well.
The attempts to add relief to the flat out of the box walls have had mixed success. On reflection I think I've been too subtle about it. but I think I need to wait and see what it looks like when painted.
Overall I think it has improved the overall composition of the scene. Its final position will be over to the right rather more so as to better relate spatially to the weighbridge hut from my normal viewing position in the office chair. Looking at the picture below it bigger than it does in the flesh for some reason. Possibly that is because of the overexposed roof.
The theory of the original plan was that the signal box would draw the eye away from the ends of the box and distract you from noticing that only half the station is modeled. My first impressions is that it has worked and it is also pulling the eye back from the join between the back scene and the hedge.
OK, there is a lot of work still to be done on it, especially the brickwork on the corners, and the roof section is still separate whilst I make my mind up about whether to fit an interior. The base it is sitting on is temporary as well.
The attempts to add relief to the flat out of the box walls have had mixed success. On reflection I think I've been too subtle about it. but I think I need to wait and see what it looks like when painted.
![]() |
| This isn't going well! |
Overall I think it has improved the overall composition of the scene. Its final position will be over to the right rather more so as to better relate spatially to the weighbridge hut from my normal viewing position in the office chair. Looking at the picture below it bigger than it does in the flesh for some reason. Possibly that is because of the overexposed roof.
The theory of the original plan was that the signal box would draw the eye away from the ends of the box and distract you from noticing that only half the station is modeled. My first impressions is that it has worked and it is also pulling the eye back from the join between the back scene and the hedge.
Saturday, 2 November 2013
Cheating
With a weekend that is currently scheduled to involve working until 9pm on Sunday night I'm wondering, as ever, about how to make life easy for myself and what shortcuts I can take.
By now I should know of course that every shortcut turns out to be a diversion with a Road Closed sign at the end of it. But something has to be done about the signal box.
So yesterday morning this popped through the letterbox:
It is a laser cut kit for a GWR signal box from Lcut Creative costing the massive sum of £6. At that price I think I can afford to try it out as an experiment. I was thinking about using it in conjunction with their other style of GWR signal box window, or with my previous attempt to utilise the Ratio frames, to help speed up building a model based on Blodwell. First of all though I'm going to build one straight out of the box. Although not correct for the TVR it has roughly the right footprint and will at least let me judge if it improves the composition before continuing to invest time in the scratchbuilt/kit bashed box.
To be honest I want to see what results I can get with laser cut wood model since I still think it is a possible way forward for the buildings on Llanrhaiadr Mochnant. I'm a little concerned that I have yet to see a painted version of one the Lcut Creative models, and I'm not sure whether the interlocking brick approach to corner joins will work or not. Actually if I could get the toy poodles to stop jumping around I might have built it by now, but I've found by bitter experience that starting work on anything whilst they are in the room is a big mistake, especially if glue, paint or scalpels are involved.
Incidentally one nice touch is that the kit includes parts for both right and left handed doors, which also gives me a couple of spare pieces to experiment on.
Lcut Creative have some You Tube content on the techniques for building these kits, and a comprehensive manual available to download.
Whilst on the subject of cheating, though I know it isn't really, I've also succumbed to order a very small selection of Silfor products. I think Apa is now at the stage where I can justify the relative expense and I can use them to best effect.
I've also been thinking about a few other things that might make life simple going forward. Most of these are below the baseboard. Something that crossed my mind the other day though is whether anyone has considered a discrete coupling, in the spirit of the Sprat & Winkle, to fit a NEM coupling socket? I know there is the Kadee option.
By now I should know of course that every shortcut turns out to be a diversion with a Road Closed sign at the end of it. But something has to be done about the signal box.
So yesterday morning this popped through the letterbox:
It is a laser cut kit for a GWR signal box from Lcut Creative costing the massive sum of £6. At that price I think I can afford to try it out as an experiment. I was thinking about using it in conjunction with their other style of GWR signal box window, or with my previous attempt to utilise the Ratio frames, to help speed up building a model based on Blodwell. First of all though I'm going to build one straight out of the box. Although not correct for the TVR it has roughly the right footprint and will at least let me judge if it improves the composition before continuing to invest time in the scratchbuilt/kit bashed box.
Incidentally one nice touch is that the kit includes parts for both right and left handed doors, which also gives me a couple of spare pieces to experiment on.
![]() |
| An attempt at adding some relief to the flat kit wall |
Lcut Creative have some You Tube content on the techniques for building these kits, and a comprehensive manual available to download.
Whilst on the subject of cheating, though I know it isn't really, I've also succumbed to order a very small selection of Silfor products. I think Apa is now at the stage where I can justify the relative expense and I can use them to best effect.
I've also been thinking about a few other things that might make life simple going forward. Most of these are below the baseboard. Something that crossed my mind the other day though is whether anyone has considered a discrete coupling, in the spirit of the Sprat & Winkle, to fit a NEM coupling socket? I know there is the Kadee option.
Friday, 11 October 2013
Back to where I started
So it is over a year and I still haven't built the signal box which was fundamental to my original design for Apa Valley. So the carefully installed but virtually invisible to the naked eye point rodding currently disappears into the undergrowth where the signal box should be. The undergrowth in question is, however,easily removable and easily exchangeable for an empty baseplate for the signal box.
There are three reasons why progress has proceeded beyond an early attempt to fabricate the windows
The first is because the signal box doesn't fit in with my plans for LM.
Secondly I know that my first attempt isn't going to satisfy me, so whatever I build will need replacing fairly quickly.
The third is my usual excuse of being too busy and on the road too much.
This week for example I've been in France since Sunday lunchtime. I got back from Grenoble on Thursday night and having been out of wi fi contact for sometime found enough work in my inbox to keep me busy until midnight, and thgen I had to get up early today to get to a meeting in Birmingham.
Actually I didn't need to get up that early to get to the meeting. I had to get up that early to get to the Ian Allan bookshop before I got to the meeting.
It seems a lifetime ago that I used to spend large amounts of time and money in their London, back in the days when I commuted to and from Waterloo. I've never got the hang of their current Birmingham shop. Clearly there is some sort of reason behind what books are where, but it is usual beyond me to work out what it is. The nice thing is that visits therefore end up being a bit of a lucky dip, especially for someone with my eclectic tastes.
On this occasion I got a nicely produced but old book on the historic railway sites of Pennsylvania, reduced to a bargain £10. More relevant to the subject of this post is I also picked up a copy of Western Region Signalling in Colour. needless to say I kept that well hidden in my briefcase during my meeting.
There is only photo in it of direct relevance, a picture of Barmouth South which like the Tanat Valley boxes was a product of Duttons but when I get round to building the interior for the model it has given me some ideas .
There are three reasons why progress has proceeded beyond an early attempt to fabricate the windows
The first is because the signal box doesn't fit in with my plans for LM.
Secondly I know that my first attempt isn't going to satisfy me, so whatever I build will need replacing fairly quickly.
The third is my usual excuse of being too busy and on the road too much.
This week for example I've been in France since Sunday lunchtime. I got back from Grenoble on Thursday night and having been out of wi fi contact for sometime found enough work in my inbox to keep me busy until midnight, and thgen I had to get up early today to get to a meeting in Birmingham.
Actually I didn't need to get up that early to get to the meeting. I had to get up that early to get to the Ian Allan bookshop before I got to the meeting.
It seems a lifetime ago that I used to spend large amounts of time and money in their London, back in the days when I commuted to and from Waterloo. I've never got the hang of their current Birmingham shop. Clearly there is some sort of reason behind what books are where, but it is usual beyond me to work out what it is. The nice thing is that visits therefore end up being a bit of a lucky dip, especially for someone with my eclectic tastes.
On this occasion I got a nicely produced but old book on the historic railway sites of Pennsylvania, reduced to a bargain £10. More relevant to the subject of this post is I also picked up a copy of Western Region Signalling in Colour. needless to say I kept that well hidden in my briefcase during my meeting.
There is only photo in it of direct relevance, a picture of Barmouth South which like the Tanat Valley boxes was a product of Duttons but when I get round to building the interior for the model it has given me some ideas .
Wednesday, 22 May 2013
Windows of Oppourtunity
By now you will have gathered I have a mental block about the signal box.
Or rather that I had one.
After work today it all started to fall into place and in just under thirty minutes I' managed to assemble the front windows to the box.
OK not the tidiest job ever, but I was making it up as I went along, and this is only meant to be for the mock up version of the box.
I even went so far as to cut out the front wall, though I'm not happy with how the arch windows line up with the bricks on the Slaters sheet so I'll need to redo that tomorrow.
I even managed to make some progress on the layout as well, so all being well tomorrow I can put in the point stools, another job I'm dreading, and put in the platform.
Or rather that I had one.
After work today it all started to fall into place and in just under thirty minutes I' managed to assemble the front windows to the box.
OK not the tidiest job ever, but I was making it up as I went along, and this is only meant to be for the mock up version of the box.
I even went so far as to cut out the front wall, though I'm not happy with how the arch windows line up with the bricks on the Slaters sheet so I'll need to redo that tomorrow.
I even managed to make some progress on the layout as well, so all being well tomorrow I can put in the point stools, another job I'm dreading, and put in the platform.
Monday, 6 May 2013
That Scary Signal Box
Actually officially it is a ground frame I believe, despite being considerably bigger than the ubiquitous Ratio GWR signal box, Signalling has never been my strong point but I presume the designation means that it was either not permanently manned and/or that it had to be released by a token of some sort.
Anyway thinking about building it has taken up a lot of time when I should actually have been doing some modelling. I've still got three or four alternative approaches in mind. Probably the obvious way forward is to build a maquette using brick paper or whatever so that I can stick in on the layout and at least get on with the scenery around it. Then I can build a more detailed effort later at my leisure.
I have been experimenting, and the key success has been the use of a scrawker to scribe glazing bars in clear plastic and then filling them in with paint. This has been much more successful than my earlier attempt where I just used a knife to scribe the bars. Clearly the scrawker removes enough plastic to allow the paint to fill the groove reliably and consistently.
I'm going to rebuild the road bridge as well, since I wasn't comfortable with the clearances of the first version. In theory that should be an evening's work. Which evening is another matter.
Anyway thinking about building it has taken up a lot of time when I should actually have been doing some modelling. I've still got three or four alternative approaches in mind. Probably the obvious way forward is to build a maquette using brick paper or whatever so that I can stick in on the layout and at least get on with the scenery around it. Then I can build a more detailed effort later at my leisure.
![]() |
| A mock up of a mock up, if that makes sense |
I have been experimenting, and the key success has been the use of a scrawker to scribe glazing bars in clear plastic and then filling them in with paint. This has been much more successful than my earlier attempt where I just used a knife to scribe the bars. Clearly the scrawker removes enough plastic to allow the paint to fill the groove reliably and consistently.
I'm going to rebuild the road bridge as well, since I wasn't comfortable with the clearances of the first version. In theory that should be an evening's work. Which evening is another matter.
Subscribe to:
Posts (Atom)


