Monday, 7 February 2022

False Spring Cleaning

 Looking out the window it is a typical False Spring day. The sun is shining but the warmth in it is superficial. Signs of true Spring are beginning to appear, but the year but I suspect bad weather is still to come.

Still it is a good time to give the office/workshop/studio a bit of a clearout. Or at least to attempt to do so.

It is always a mess at this time of year. Stuff seems to accumulate in it over Xmas and as Issy has a new year clearout from the cottage. The construction of Flemish Quay has also taken up a lot of space. A catch with micros is you can't use the baseboard itself as a workbench, and you also end up working on the different elements - track, scenery, building construction and so on - at the same time, because of the level of integration between them.

It is fair to say my workbench was becoming a mess...
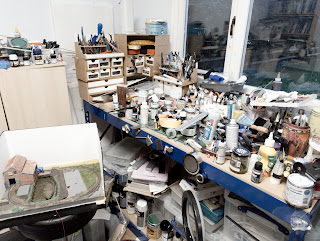

...So what to do about it?

Well, being me, I started by having a clearout on the office side of things.This was well overdue and hadn't been done since we built this office and just put everything even vaguely office-related into it. That included stuff that had moved with us several times without being looked at, such as manuals for long gone bikes, TVs and computers. I did keep those that I thought might have longer-term value, such as my Psion manuals from my coding days. other than that though I've been ruthless, and once again came close to needing a new shredder. The ruthlessness extended to a few things of sentimental value as well.

That at least gave me some floor space to start to address the workshop side. It should be noted at this point that anything related to the photography studio aspect is sacred and not to be touched - at least not unless I make a big decision and investment that I'm considering of the less is more but also a heck of a lot more expensive variety. 

The obvious problem with the workshop is I have too many projects up here that belong in tin shed limbo. Whilst the Cadeby mico is out on display I'm not going to be doing anything with the vast bulk of my OO9 stock and projects just yet. I do have a couple of ideas in mind. so off they go to the tin shed.

Something else taking up space are my experiments in 4mm couplings. Now I've settled on Kadees there is no point keeping them up here. They might come in useful if I ever build TAoC in EM, but I strongly suspect that it will either be in OO or 7mm. I'm keeping the 7/8ths projects up here for now, although once completed they will move to the tins sheds to be close to the year to be built line.

So what is left hogging up space? There are the magazines I consider too valuable to put in the sheds, my stash of scenic materials, and tons of tools and paints. I can't do much with the magazines but I do need to find a better way of storing the tools and things. the small ones are fine, it is anything over about 6" long that I find difficult to store in a way that is both accessible and out of the way when not needed. Pegboard might be the answer, but I can't work out where to put it.

Beyond that, the time has come to say goodbye to many of my cupboards that could, at best, be described as Heritage Stock.

Tuesday, 1 February 2022

Ways with a Cliché

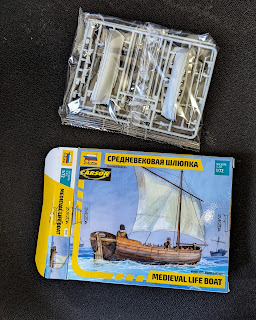
This kit will be familiar to many of you. It turns up on just about every layout built in the last few years that features a harbour.

I've been trying very hard to resist it, because it is such a cliche. Like most modelling cliches it is a victim of its own success. It is a nice little kit of an attractive prototype that isn't readily available in other forms. You see it on one layout and think "Yep, that will work for me"

My basic test for a modelling cliche is you look at a layout and think "Oh, that is the (Name of model and manufacturer)"  The moment you recognise the model, the sense of illusion goes, at least for me. 

Which is fine, you can avoid them, until the cliche actually turns out to be just what you need because it matches a prototype.

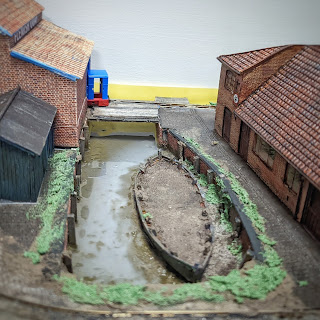
That is the case here. There are several photos of Fenland rivers that feature boats with a distinct resemblance to this one.

So what to do with it, to make the origin less obvious? Well first of all there is some extra detail to add, it is missing the ribs that are a vital part of the construction. I'm hoping I can use microstrip to replicate them. I can leave out the anachronistic sailing rig as well, though I might one day build one with a more modern one. On the Welland this would have been rowed, or perhaps converted to an inboard engine. But if rowed it would have used removable rowlocks, not the primitive arrangement portrayed by the kit. Finally, the coaming around the helmsmen's position can probably go. Combine that with a painted hull and I hope the base model won't be too obvious.


Wednesday, 26 January 2022

Water Works

I've been dreading adding the water to Flemish Quay. Over the years I've tried most of the common techniques and never been happy with the results.

After an experiment on behalf of one of my nephews in producing 2mm scale fish - a task successfully accomplished using the foil from packets of blood-pressure tablets - I found myself with a spare bottle of Deluxe Materials Aqua Magic.  It is seriously expensive stuff, but rather than waste it, I thought I would use it on this project. I was also quite impressed with a demo I'd seen using the Woodland Scenics Aqua Tints - again not cheap but I thought I might as well experiment.

So how did it go?

Well, my first two attempts were a bit of a failure.

They looked good when first poured, and using Frog Tape I didn't get as much leakage as expected around the baseboard edge. Over time though both pours seemed to dry to a much thinner layer. I suspect there were more gaps between the two layers of foam baseboard than I realised, despite having sealed them first. Much more of a problem was that having looked fine six hours after the first pour when I came back in the studio, next morning, it had pooled in some places and climbed up the walls in others. I think a number of factors were at work, the temperature in the studio, surface tension, and that the channels I was pouring it into were of very different widths.

Yesterday's attempt seems much more successful. Partly because any gap between the foam layers is well and truly sealed, but also because I did it at a much higher temperature. I have a couple of bits to iron out with a final thin layer but it is getting there. Like so much on this project though it has been a useful learning exercise.


Friday, 21 January 2022

The Warehouse


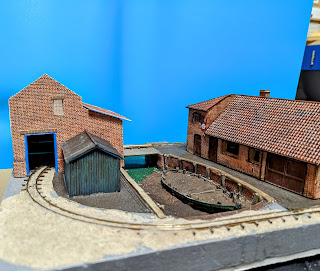
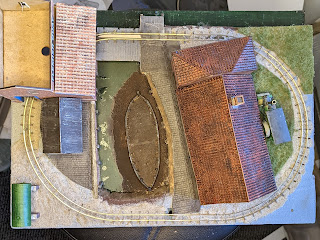
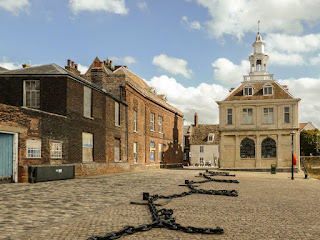
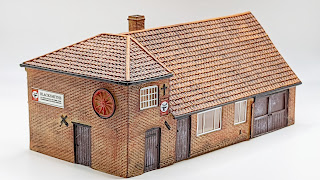
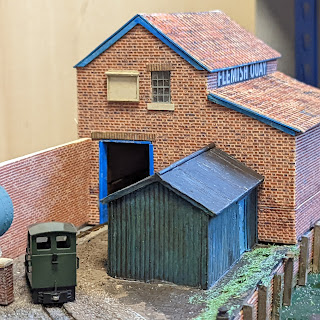
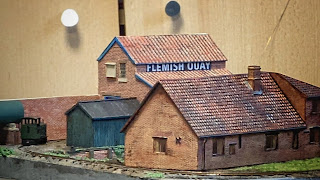
Along with the forge Flemish Quay has been built around the ubiquitous Petite Properties Harper's Yard. At the same time it has also been my intention to try and disguise that fact as much as possible, simply because it IS so ubiquitous that it has become a cliche. In building it I've also had one of my favourite warehouses from Purflet Quay in mind.

The perils of relying on modern photos -
 I've now discovered that some of the "period" detail on the building is quite modern,
possibly even added for film work


I did consider building it as a mirror image, but it works better as a scenic block built as intended. The major changes I have made are adding extra height to the ground-floor. Unfortunatly I had to do that quite late in the day, after my plan A failed and I'd already used expensive Redutex brickwork that I didn't want to waste. That has left me with a join to hide, but I have ideas for disguising it. I've also blanked off some doors and windows, which in any case wouldn't have made sense in the location on the quay. The AnyScale resin shed plonked in front of it also keeps the train out of view for just that little bit longer.

It is very much still a WIP and there are lots of things I will change. For instance using the precut parts with the thicker brick material looks a little odd. I'm also biting the bullet and investing in Modelu guttering and downpipes. I also need to consider weathering, which is such a feature of the building in Kings Lynn.

Looking at the photos you'll see I'm beginning to slowly add more groundwork. Evident in the top photo is the new to me Tamyia Grass Texture diorama "paint". I haven't made my mind up about this  yet, or their "mud". It doesn't help that they are both very expensive products.I'm also continuing to slowly work up the forge to resemble the real thing.

In the great ledger of modelling this is proving to be a useful learning exercise. I'm glad now I've done this before moving on to Grundy's Yard, which I now feel a lot more confident about.

Thursday, 13 January 2022

That Awkward Stage

There is a point in building most of my layouts where I despair. Flemish Quay has hit that point. Fortunately, having been here so many times before, I know to press on.


I'm at the stage where the landscape is blocked out and the buildings are half-finished, and it all looks a mess, not least because it looks like a lot of separate things, randomly assembled.


Which, in a way, it is.

I'm dependent now on two things. One is the scenic elements missing from the photos, particularly the walls, fencing and vegetation, as well as the chain bridge itself. The other is the lack of a unifying and blended palette of colours. Particularly glaring arethe ballast, which will become a dark brown gray, the coping stones on the harbour wall, and the "water" which will be an olive brown colour. I have also been quite cruel to the layout by taking these photos with the help of a ring light. That is deliberate, because it really highlights discrepencies.


Tuesday, 11 January 2022

A load of Cobbles

Or, more accurately, setts.

I'm increasingly aware that I'm using Flemish Quay to try out ideas for an eventual Kings Lynn/Great Yarmouth based layout. So one of the things I wanted to try out was replicating the cobbles on King Lynn's Purfleet Quay.


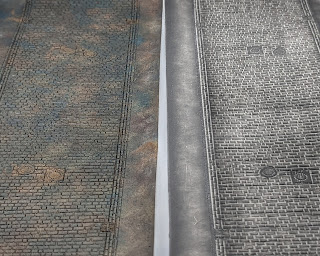
Being observant people you will have instantly noticed that there are actually two different types of sett laid next to each other.  I didn't, which explains why I got very frustrated trying to match photos.  Incidentally, I've also since found out these are a relatively modern feature.

My original plan was to use Intentio cobbles, but I decided to play safe and go with Redutex setts. Out of the packet, on the righthand side, these are an acceptable grey colour. You might quibble about the light mortar, but a dark wash would sort that out.


On my left is my first attempt at matching the prototype, whilst also making them look a little less cared for. Essentially it is various shades of cheap purple and brown acrylics applied with makeup sponges, then unified with a black wash. Before the wash was applied it looked somewhat startling. Once in place I'll apply some sandy washes to tone it down even more, and pick out the drain covers in a darker colour.


Monday, 10 January 2022

Suppliers

Work on Flemish Quay has been subject to a little delay. We had the big family "Xmas" over the New Year which kept me tied to the kitchen as head chef and bottlewasher, and then it was back to the day job.

A break does give you a chance to review progress, so I've decided to change one or two things and add some extra detailing that I wasn't initially planning on since I wanted to keep costs down. The big driver has been trying to maintain a consistent palette of both colours and textures, based on those of the Hornby building. So even more Redutex sheets are being utilised. 

I made some major miscalculations about the height and location of the Petite Properties Harpers Yard building. So that means major additions to both the structure and the foam baseboard.  Overall I think this has actually led to visual improvement as well. The origin of the building is less obvious and it does a better job of disguising an awkward corner. 

I've also begun some remedial cosmetic work on the forge itself. It isn't a bad model, but there is a lot of unpainted brickwork on it around things like the drainpipes, the mortar courses are bright yellow resin, and the roof tiles are far too uniform.  Oddly the yellow mortar is less obvious than you would think. 


What I have discovered is why they have printed the windows white, rather than the brown of the prototype. As soon as you paint them the thick resin interior suddenly becomes very obvious

Having mentioned Petite Properties it is worth calling out some of the other suppliers I've used, especially the ones that have provided a great service over the holiday break. 

ScaleModelScenery are a great source of low-cost details, especially where they are background items, like bicycles. 

Modelu are the source of the very few figures that will appear on the layout. If I didn't happen to have a supply of parts in stock I would have also used them for a lot of architectural details.

Anyscale is a less well-known supplier with some useful and cheap resin cast details, though you do need to to choose carefully from the range.

Then there is my local model shop, Masons Models in Spalding who are my supplier of stripwood and paints. It is a good all-round model shop, and I always feel guilty that my modelling interests are too specialist to make more use of them.

Rails of Sheffield have proven to be a fast and reliable source of Redutex sheets. I'd more or less given up on this range, partly because of supply challenges, partly because I find them just a little too thick. 

Finally, there are NGTrains/EDM Models who are my source for blue manual point "motors".

Now since Flemish Quay doesn't involve any paintwork, why would I need point controllers ;-)